Continuous Integration
Travis CI
Travis is a service for running unit tests in the cloud. Every commit you make and every pull request your project receives is seen by Travis, which spins up a Docker container and runs your tests. With a little work, it supports Common Lisp.
Travis is controlled by a file in your repo’s root, .travis.yml. It defines
some options, like the language the project is written in, the list of shell
commands that have to be executed prior to running the tests, and whom to send
notifications to.
YAML is an easy to read format for structured data. Tools like Ansible, Chef and Salt have made it popular for configuration management and deployment. The result is basically a shell script, but structured into different sections.
To test a Common Lisp project, we use cl-travis. This provides a script that you can tell Travis to download, which sets up the Common Lisp implementation of your choice (you can test on many – more on that below), and installs Quicklisp.
Without further ado, this is what the simplest .travis.yml looks like:
language: common-lisp
sudo: required

env:
  matrix:
    - LISP=sbcl
    - LISP=ccl

install:
  # Install cl-travis
  - curl https://raw.githubusercontent.com/luismbo/cl-travis/master/install.sh | bash

script:
  - cl -l fiveam
       -e '(setf fiveam:*debug-on-error* t
                 fiveam:*debug-on-failure* t)'
       -e '(setf *debugger-hook*
                 (lambda (c h)
                   (declare (ignore c h))
                   (uiop:quit -1)))'
       -e '(ql:quickload :my-project-test)'

notifications:
  email:
    - my-email@gmail.com
The first two items just define the language of the project and tell it that
sudo is required to run the tests. cl-travis requires sudo, so we’ll have to
set it to required at least for now.
Every item in the env.matrix list will create a new build with a certain
configuration of environment variables. In this case, we want to test on both
SBCL and CCL, so we use this:
env:
  matrix:
    - LISP=sbcl
    - LISP=ccl
The install list is just a list of shell commands to execute to set up the
test environment. Here, we just download and install cl-travis:
install:
  # Install cl-travis
  - curl https://raw.githubusercontent.com/luismbo/cl-travis/master/install.sh | bash
Projects which require system libraries to run the tests, like Crane,
can install and configure those in the install list:
install:
  # Install cl-travis
  - curl https://raw.githubusercontent.com/luismbo/cl-travis/master/install.sh | bash
  # Install the latest versions of the major dependencies
  - git clone https://github.com/fukamachi/sxql.git quicklisp/local-projects/sxql
  - git clone https://github.com/fukamachi/cl-dbi.git quicklisp/local-projects/cl-dbi
  # Update package repos
  - sudo apt-get update
  # Install SQLite
  - sudo apt-get install -y sqlite3
  # Set up Postgres
  - sudo -u postgres createdb crane_test_db
  - sudo -u postgres psql -c "CREATE USER crane_test_user WITH PASSWORD 'crane_test_user'"
  - sudo -u postgres psql -c "GRANT ALL PRIVILEGES ON DATABASE crane_test_db TO crane_test_user"
For projects that you’d like to test using the latest version of dependencies,
you can clone them to the ~/lisp folder. For instance, this is the install
list of the .travis.yml file for Scriba:
install:
  # Install cl-travis
  - curl https://raw.githubusercontent.com/luismbo/cl-travis/master/install.sh | bash
  # Clone the latest common-doc
  - git clone https://github.com/CommonDoc/common-doc.git ~/lisp/common-doc
  # Clone the latest common-doc-plump
  - git clone https://github.com/CommonDoc/common-doc-plump.git ~/lisp/common-doc-plump
Finally, the script is the actual testing itself. cl-travis install
CIM, a command line utility for managing and running different Lisp
implementations under a common interface.
The cl command launches a Lisp image, and the -l flag can be used to
Quickload a library. The -e flag lets us execute code, and here’s where we set
up what happens on failure and how to run the tests.
If you’re using FiveAM for testing, you need to tell it to enter the
debugger on test failures and errors. Then, hook up the debugger to
UIOP’s1 implementation-independent quit function. This ensures that on a
test failure the script exits with -1, which tells Travis the tests have
failed. Then, we just Quickload the test system to run the tests:
script:
  - cl -l fiveam
       -e '(setf fiveam:*debug-on-error* t
                 fiveam:*debug-on-failure* t)'
       -e '(setf *debugger-hook*
                 (lambda (c h)
                   (declare (ignore c h))
                   (uiop:quit -1)))'
       -e '(ql:quickload :my-project-test)'
If you’re using fukamachi’s prove for testing, you use this:
script:
    - cl -l prove -e '(or (prove:run :my-project-test) (uiop:quit -1))'
Enabling Travis
To use Travis, you need to sign up with your GitHub account. Then hover over your name in the upper right-hand corner of the page and go to your profile page. This will give you the following page:
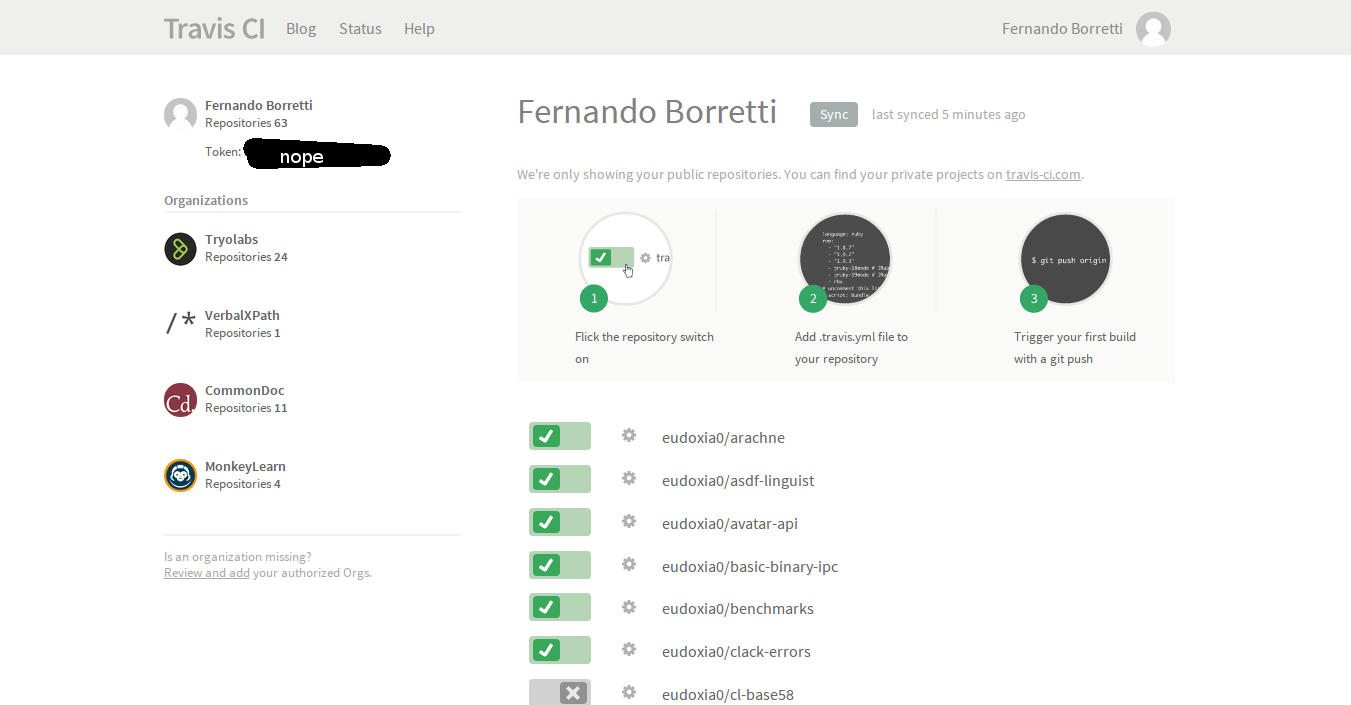
If you’re just pushed the repo, chances are you need to click on ‘Sync’ to update the list of repos.
Then you click on the switch next to the repo’s name to enable it, and then all you have to do is push a commit to trigger a build. Travis, like all services, has its ups and downs in terms of availability. So some times builds will start almost instantaneously, other times they’ll take longer.
Gitlab CI and Docker
Gitlab CI is part of
Gitlab and is available on Gitlab.com, for
public and private repositories. Let’s see straight away a simple
.gitlab-ci.yml:
image: daewok/lisp-devel

before_script:
  - apt-get update -qy
  - apt-get install -y git-core
  - git clone https://github.com/foo/bar ~/quicklisp/local-projects/

test:
  script:
    - make test
Gitlab CI is based on Docker. With image we tell it to use the
daewok/lisp-devel
one. It includes SBCL, ECL, CCL and ABCL, and Quicklisp is installed
in the home (/home/lisp/), so we can quickload packages right
away. If you’re interested it also has a more bare bones option. Gitlab will load the
image, clone our project and put us at the project root with
administrative rights to run the rest of the commands.
test is a “job” we define, script is a
recognized keywords that takes a list of commands to run.
Suppose we must install dependencies before running our tests:
before_script will run before each job. Here we clone a library
where Quicklisp can find it, and for doing so we must install git
(Docker images are usually pretty bare bones).
We can try locally ourselves. If we already installed Docker and
started its daemon (sudo service docker start), we can do:
docker run --rm -it -v /path/to/local/code:/usr/local/share/common-lisp/source daewok/lisp-devel:latest bash
This will download the lisp image (±400Mo), mount some local code in
the image where indicated, and drop us in bash. Now we can try a make
test.
To show you a more complete example:
image: daewok/lisp-devel

stages:
  - test
  - build

before_script:
  - apt-get update -qy
  - apt-get install -y git-core
  - git clone https://github.com/foo/bar ~/quicklisp/local-projects/

test:
  stage: test
  script:
    - make test

build:
  stage: build
  only:
    - tags
  script:
    - make build
  artifacts:
    paths:
      - some-file-name
Here we defined two stages (see
environments),
“test” and “build”, defined to run one after another. A “build” stage
will start only if the “test” one succeesds.
“build” is asked to run only when a
new tag is pushed, not at every commit. When it succeeds, it will make
the files listed in artifacts’s paths available for download. We can
download them from Gitlab’s Pipelines UI, or with an url. This one will download
the file “some-file-name” from the latest “build” job:
https://gitlab.com/username/project-name/-/jobs/artifacts/master/raw/some-file-name?job=build
When the pipelines pass, you will see:
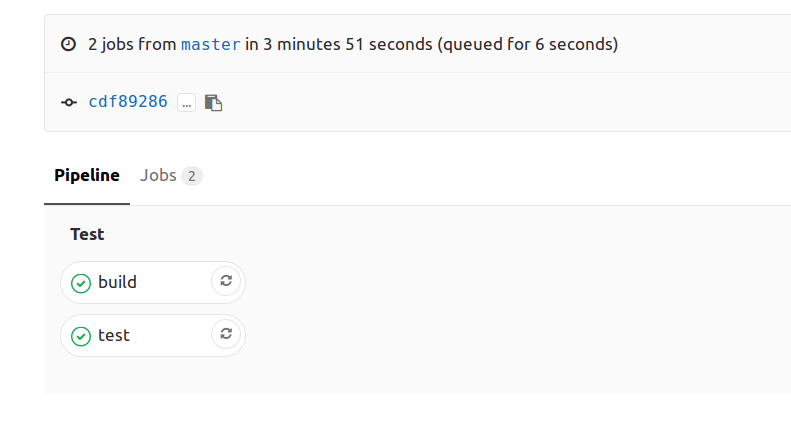
You now have a ready to use Gitlab CI.
- source: the CL Cookbook
Coverage Tracking
Code coverage is basically how many lines of source code are run by tests. SBCL supports coverage measuring, and can generate some HTML reports of coverage, but it requires some manual operation.
Enter Coveralls: This is a service that takes raw code coverage data and tracks it. It shows you covered files, which lines are executed and which are not, the evolution of coverage over time, and also tells you what a pull request will do to coverage.
Coveralls works with Travis, so now extra files are needed: You run the code coverage in the Travis build, along with the tests, and send the data to Coveralls for tracking. The library that does all this is cl-coveralls, which provides a macro that wraps some code in coverage measuring.
To add Coveralls support to the .travis.yml file, we first set the COVERALLS
environment variable to true for a particular implementation (preferably
SBCL):
env:
  matrix:
    - LISP=sbcl COVERALLS=true
    - LISP=ccl
Then, we clone cl-coveralls:
install:
  # Coveralls support
  - git clone https://github.com/fukamachi/cl-coveralls ~/lisp/cl-coveralls
In the script part, we load coveralls along with our testing framework, and
then wrap the code that runs tests in the with-coveralls macro:
script:
  - cl -l fiveam -l cl-coveralls
       -e '(setf fiveam:*debug-on-error* t
                 fiveam:*debug-on-failure* t)'
       -e '(setf *debugger-hook*
                 (lambda (c h)
                   (declare (ignore c h))
                   (uiop:quit -1)))'
       -e '(coveralls:with-coveralls (:exclude (list "t"))
             (ql:quickload :my-project-test))'
Note how we used the :exclude option to prevent testing code from falling into
coverage tracking.
Enabling Coveralls
The process is similar to enabling a repo for Travis:
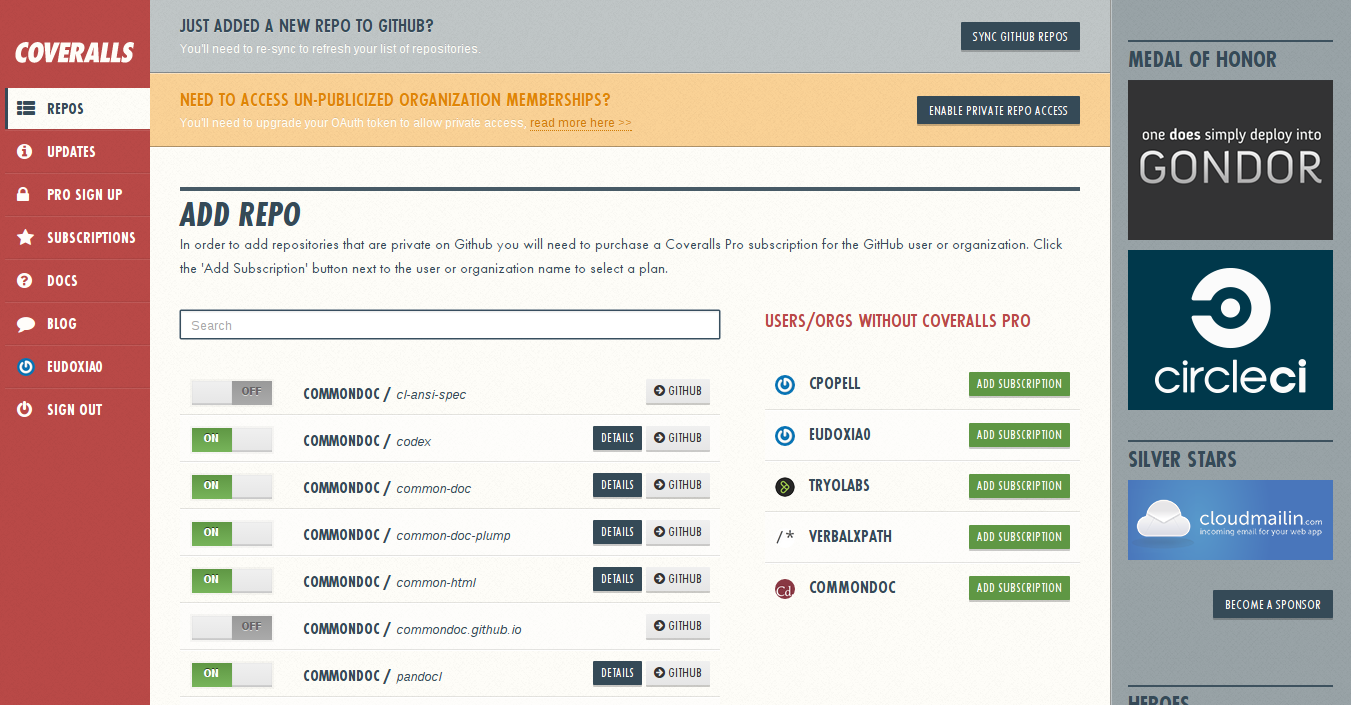
You flick the switch to enable or disable a repo, and if the repo is new, click on ‘Sync GitHub Repos’ up there near the top of the page.
Badges
Now, the whole point of this is letting users know what state the software is in. Both Travis and Coveralls give each project a status badge, and image you can put in the README to let users know upfront that the project’s in working order and what the coverage status is.
Here’s the Markdown for Travis and Coveralls badges:
# Project Name
[](https://travis-ci.org/USER/REPO)
[](https://coveralls.io/r/USER/REPO?branch=master)
Projects
Below is a (necessarily incomplete) list of projects using Travis and/or Coveralls: